Full Scan Support for Malaysia and Singapore ID Cards

The PixLab OCR team is pleased to announce that it fully support now scanning ID cards from Malaysia (MyKad), Singapore, India Aadhaar, Emirates (UAE) ID & GCC Residence Card, US Driver's License, as well governments issued Passports from all over the world via the /docscan API endpoint.

Besides its robust text scanning features, the /docscan API endpoint shall Extract (crop) any detected face and transform the extracted text content such as ID card fields (name, ID number, address, etc.) or Passport Machine Readable Zone (MRZ) into JSON object fields ready to be consumed by your code.

Below, a typical output result of the /docscan endpoint for a Malaysian ID card (MyKad) input image:

Input ID card Specimen

ID card specimen

Extracted ID Card Fields

extracted fields

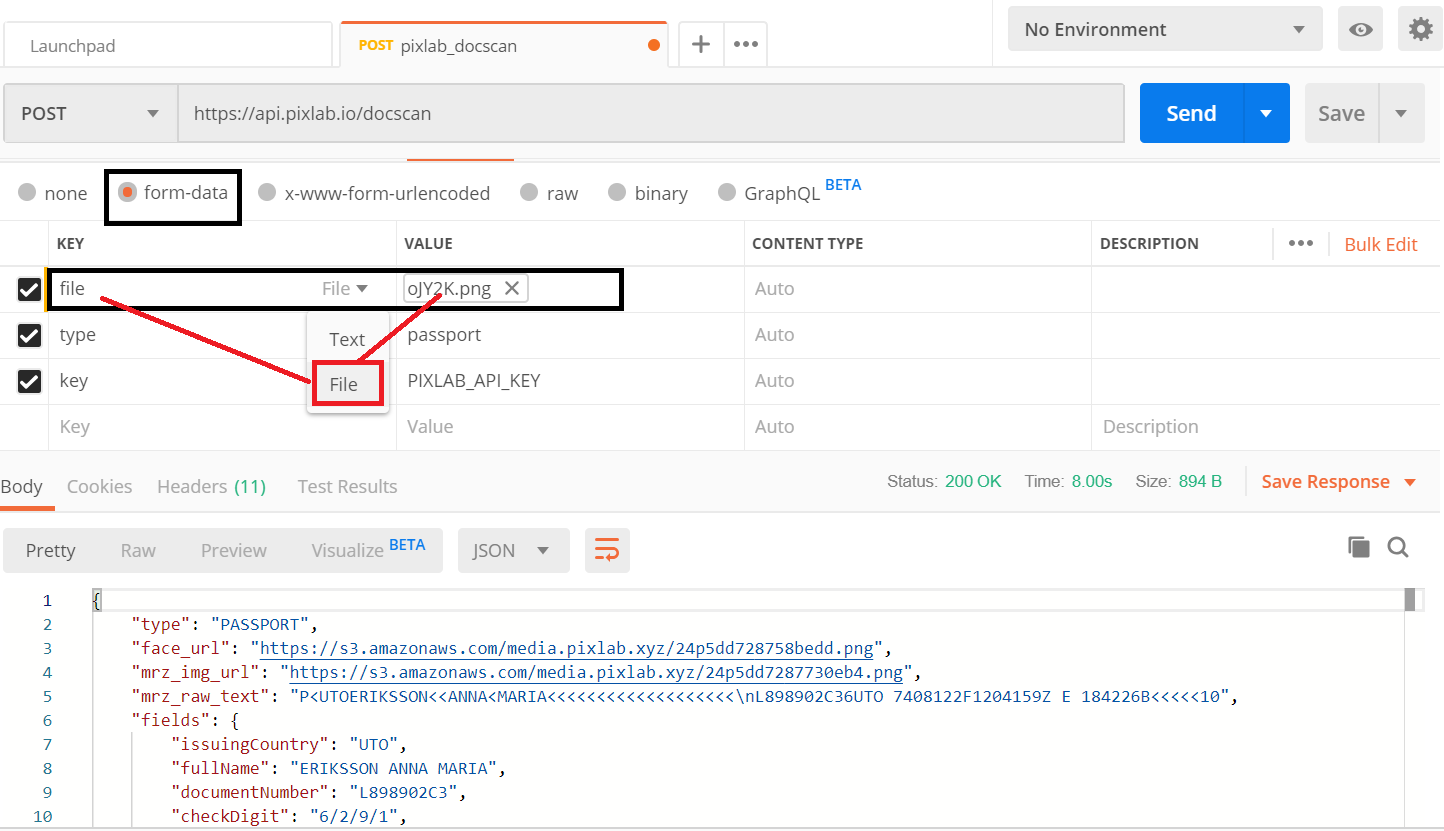
The same applies for Passports:

Input Passport Specimen

Passport Specimen

Extracted MRZ Fields

MRZ Fields

The code samples used to achieve such result are available to consult via the following Github links:

Face extraction is automatically performed using the /facedetect API endpoint. If you are dealing with PDF documents, you can convert them at first to raw images via the /pdftoimg endpoint.

Finally, the official endpoint documentation is available to consult at pixlab.io/cmd?id=docscan and a set of working samples in various programming language are available at the PixLab samples pages.

Porting a Face Detector Written in C to WebAssembly

This article share the technique used by PixLab to port the real-time face detection runtime written in pure C of the SOD Computer Vision library to WebAssembly to achieve real-time face detection on the browser.

The final result including the WASM binary, face model and the exported Javascript interfaces are available to download here and ready to be integrated into existing projects in-need for real-time face detection in the browser.

The full article is available to consult here.

fd

Milestone Reached for the PixLab NSFW API Endpoint

The PixLab Computer Vision team is pleased to announce that a milestone have been reached for the Not Safe For Work API endpoint. Over the course of the last 12 months, the /nsfw API endpoint have already analyzed millions of our user's media files with high accuracy.

For those not familiar with this endpoint. /nsfw let you detect not suitable for work (i.e. nudity & adult) content in a given image or video frame. NSFW is of particular interest, if mixed with some media processing API endpoints like /blur, /encrypt or /mogrify to censor images on the fly according to their nsfw score.

A typical blurred image with a high NSFW score should look like the following:

blurred image

To obtain such image result, two endpoints were actually used:

  • /NSFW is the analysis endpoint that must be called first. It does perform nudity & adult content detection and return a score value between 0..1. The more this value approaches 1, the more your picture/frame is highly nsfw.
  • /blur is called later only if the nsfw score value returned earlier is greater than certain threshold. In our case, it is set to 0.5.

The Python code below was used to generate the blurred picture programmatically without any human intervention. This can help you automate things such as verifying user's uploads:

import requests
import json

# Target Image: Change to any link (Possibly adult) you want or switch to POST if you want to upload your image directly, refer to the sample set for more info.
img = 'https://i.redd.it/oetdn9wc13by.jpg' 
# Your PixLab key
key = 'Pixlab_Key'

# Censor an image according to its NSFW score
req = requests.get('https://api.pixlab.io/nsfw',params={'img':img,'key':key})
reply = req.json()
if reply['status'] != 200:
    print (reply['error'])
elif reply['score'] < 0.5 :
    print ("No adult content were detected on this picture")
else:
    # Highly NSFW picture
    print ("Censoring NSFW picture...")
    # Call blur with the highest possible radius and sigma
    req = requests.get('https://api.pixlab.io/blur',params={'img':img,'key':key,'rad':50,'sig':30})
    reply = req.json()
    if reply['status'] != 200:
        print (reply['error'])
    else:
        print ("Censored image: "+ reply['link'])

Finally, the official endpoint documentation is available to consult at https://pixlab.io/cmd?id=nsfw and a set of working samples in various programming language are available at the PixLab samples pages.