At PixLab and Symisc Systems, we build systems that move data between native C++ code and Python-based machine learning workflows. In practice, that often means dealing with NumPy array files.
Today, we are open-sourcing syNumpy, a standalone C++17 library for reading and writing NumPy .npy files.
syNumpy is designed to be simple to integrate, easy to understand, and reliable in production. It gives native applications a clean way to exchange numerical arrays with Python tooling without dragging in a heavy dependency stack.
Why We Built It
In computer vision, facial analysis, visual search, OCR, and document processing, moving tensors and feature vectors across systems is routine. NumPy’s .npy format is a practical interchange format, but using it directly from C++ often means either relying on outdated code, pulling in more infrastructure than needed, or maintaining internal glue code.
We wanted something better:
modern C++17
small and focused API surface
easy vendoring into existing projects
explicit validation and predictable failures
production-ready .npy support without unnecessary complexity
That became syNumpy.
Production-Tested Inside FACEIO and PixLab
syNumpy is not a toy project or a throwaway utility. It is used internally by FACEIO for facial feature extraction workflows and by PixLab / Symisc Systems across production systems tied to visual search, document processing, and identity-document scanning.
the DOCSCAN API endpoint for scanning passports, driver licenses, visas, residence permits, and other identity documents issued around the world
That production use shaped the library directly. The goal was not to ship a bloated abstraction layer. The goal was to ship something dependable.
What syNumpy Provides
syNumpy focuses on doing one thing well: reading and writing NumPy .npy arrays from modern C++.
Current highlights include:
support for NumPy .npy files
a standalone C++17 implementation
a compact API centered around:
syNumpy::NpyArray
syNumpy::loadNpyBuffer()
syNumpy::loadNpy()
syNumpy::saveNpyRaw()
typed syNumpy::saveNpy() overloads
append mode support for compatible arrays
strict validation of malformed headers and truncated payloads
explicit runtime failures through syNumpy::Error
The core parser entry point is syNumpy::loadNpyBuffer(), which makes the library useful in embedded, memory-mapped, or network-driven workflows where the file is already available in memory.
Integration Is Intentionally Simple
One of the main design goals was frictionless integration.
The easiest way to use syNumpy is to add these two files directly to your codebase:
synumpy.hpp
synumpy.cpp
Compile them with your existing C++17 target and you are done.
No service layer. No code generator. No large runtime dependency stack.
The repository also includes a CMakeLists.txt and a simple Makefile, but the direct drop-in path is the intended fast path for most teams.
There is a practical gap between Python-first tooling and production-grade native applications. syNumpy is meant to help close that gap.
If your system is already in C++, but your models, offline tooling, embeddings, or data-preparation steps live in Python and NumPy, having a straightforward .npy bridge matters. That is especially true in machine vision and identity workflows, where performance, reliability, and integration simplicity matter more than abstraction for abstraction’s sake.
Open Source and Licensing
syNumpy is released under the BSD 3-Clause License.
We are releasing syNumpy because it solves a real problem we face in production, and because we think the wider C++ and machine vision community can benefit from a small, modern, well-scoped NumPy .npy library.
If you are building native AI, ML, OCR, document-analysis, or vision systems and need a direct bridge to NumPy arrays, syNumpy is built for exactly that use case.
PixLab’s Vision VLM Platform introduces a groundbreaking set of Vision Language Model (VLM) endpoints that combine natural language processing and computer vision in a simple, developer-friendly API suite.
From querying images and parsing complex documents to generating PDFs and extracting ID data, the PixLab VLM API makes it easy to integrate intelligent image and document analysis into your own apps.
Vision Language Model Endpoints
These endpoints allow your application to understand images and video frames with natural language intelligence.
/query – Ask natural language questions about images and receive contextual answers
/describe – Get a natural language description of an image
/tagimg – Retrieve tags describing the image content
/detect – Detect and localize objects in the image
Whether you're working on an AI productivity suite, eKYC onboarding, or document automation pipeline, PixLab’s VLM API delivers powerful, production-ready tools in minutes. All endpoints are accessible via secure HTTP requests and require no proprietary SDKs.
Get started by signing up for an API key at PixLab Console and explore what's possible with Vision Language Models.
What is Livesness Detection and Face Anti-Spoofing?
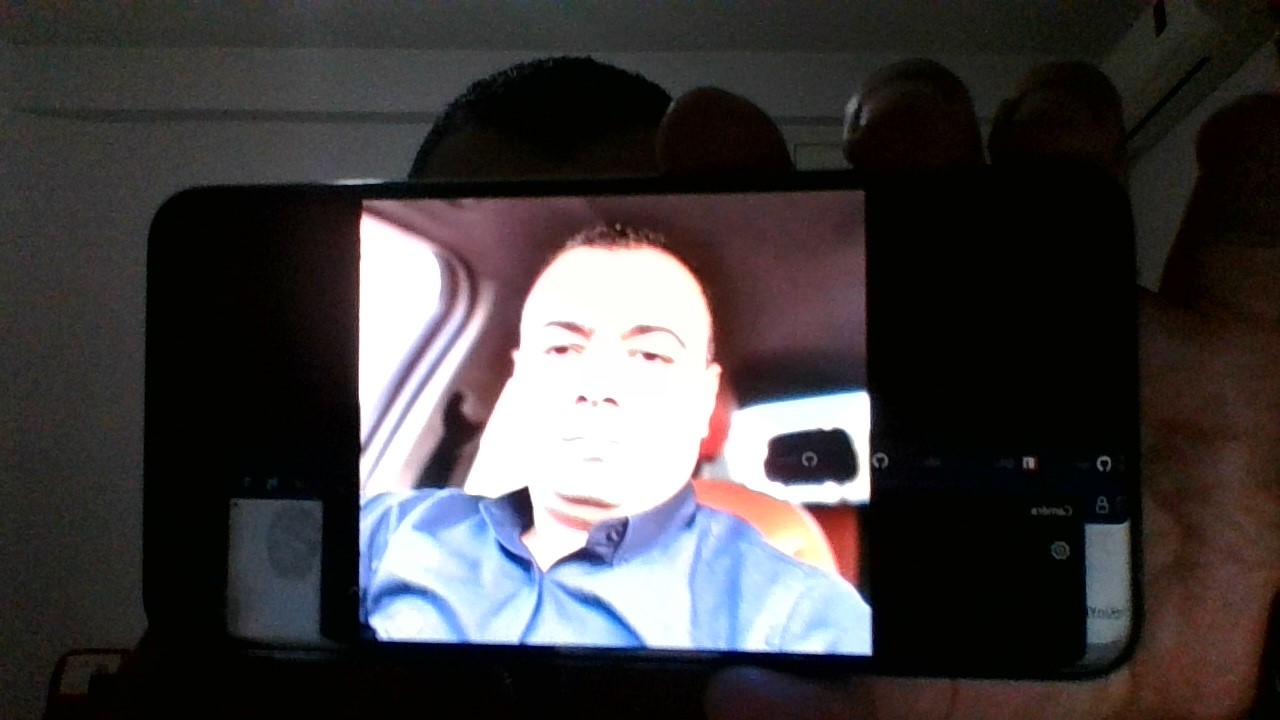
Livesness detection introduced in late 2023 and already integrated and available to FACEIO customers, also known as face anti-spoofing, is a security feature that ensures that the person being authenticated is a living human being and not a photo, video, or mask.
This innovative model is designed to provide enhanced security and accuracy in face authentication, making it an essential tool for businesses and individuals alike.
One of the key features of this model is its ability to detect faces in a single shot, without requiring multiple images or video frames.
In addition, this model is highly accurate and can detect even the most sophisticated face spoofing attacks, including those that use 3D masks and other advanced techniques.
This makes it an ideal solution for businesses and organizations that require a high level of security and accuracy in their face authentication systems. Customers are already invited to try out the new face Anti-Spoofing model directly within the FACEIO Widget!
Conclusion
PixLab's new single shot livesness, face anti-spoofing, and deep-fake detector model is a game-changer in the world of face authentication.
With its advanced AI algorithms and highly accurate detection capabilities, this model provides enhanced security and convenience for users, while still maintaining a high level of accuracy and reliability.
Whether you are a business owner or an individual user, this model is an essential tool for anyone who values security and convenience in their face authentication systems.
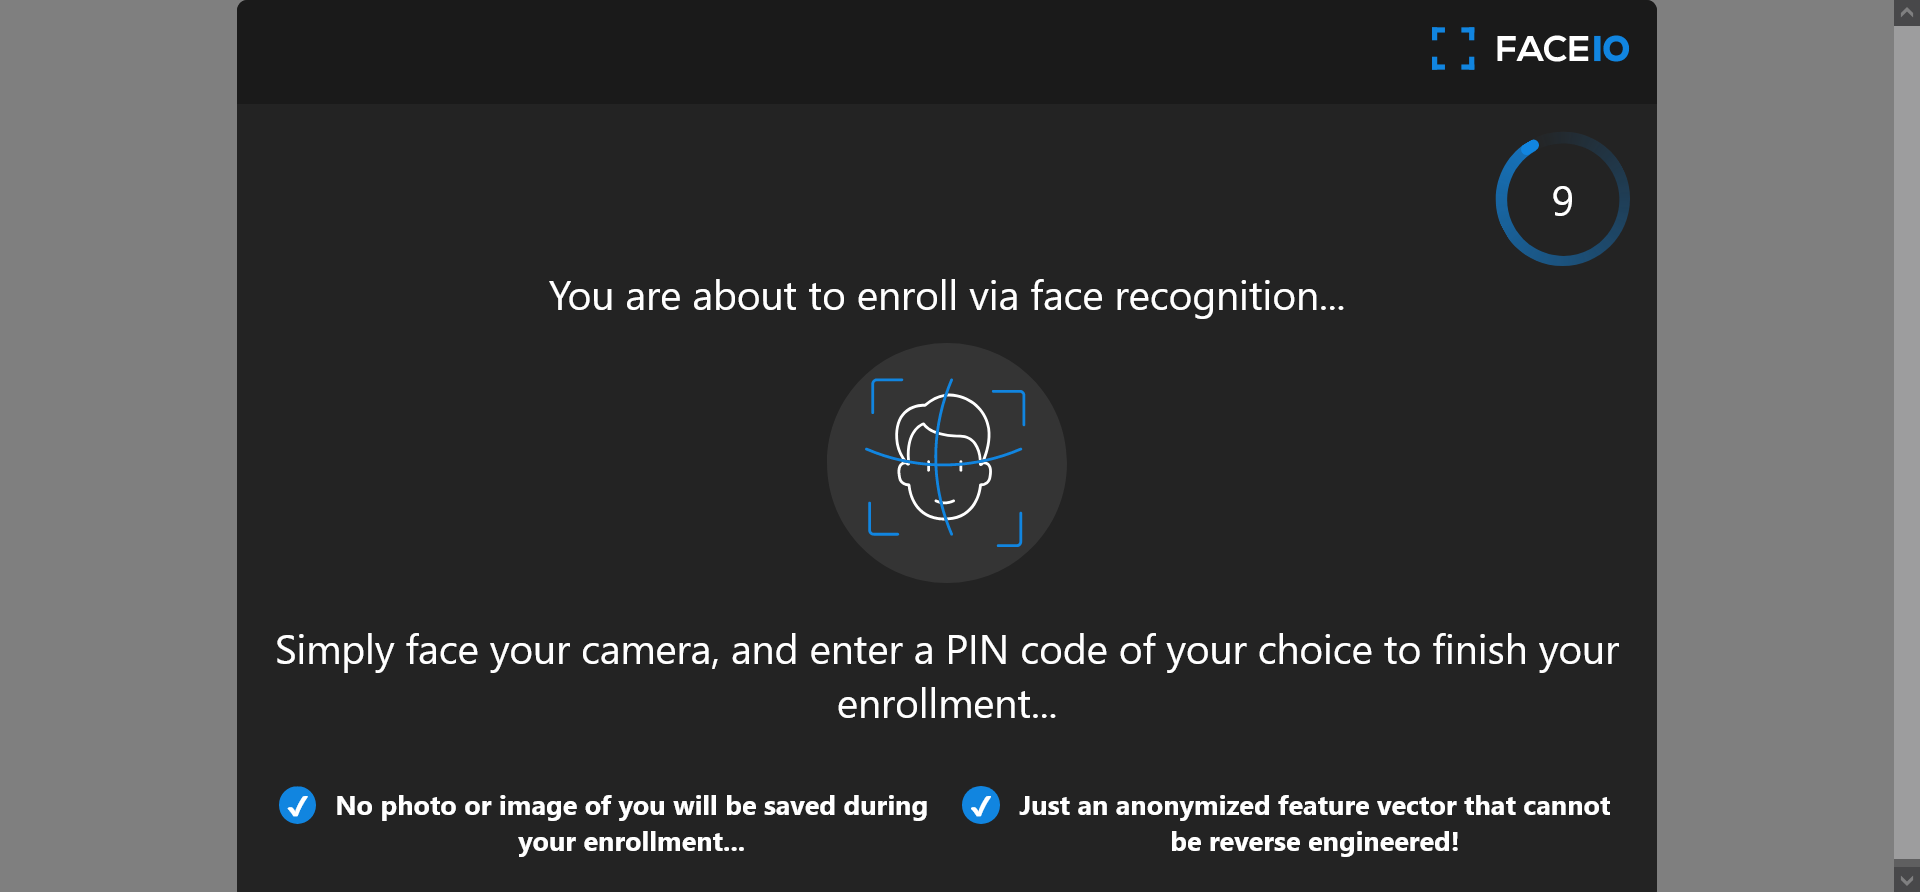
The FACEIO Development Team is thrilled to announce the immediate availability of fio.js V2.1, our cutting-edge Facial Recognition Web Framework with groundbreaking new features with the goal of enhancing security and compliance for your applications.
Over the past few months, we have developed an innovative age verification security option that prevents minors from on-boarding on your application, ensuring your sensitive services remain accessible only to the appropriate age groups.
Enhanced Security with Minors Access Prevention 🛡️
When activated, this powerful security feature diligently screens and identifies users' age during the on-boarding process, and thus will forbid minors less than 18 years old from enrolling on your application with the fioErrCode.MINORS_NOT_ALLOWED error code being raised if a minor try to on-board on your application, reinforcing your compliance and security measures. This highly requested security feature is immediately available to trigger from the FACEIO Console. Please refer to the updated boilerplate integration code to see this feature in action.
Comply with Jurisdictional Regulations 📜
If your application is offering sensitive services or operating in jurisdictions such as the UK and certain US states that strictly prohibit minors from accessing such services, this security feature is mandatory & invaluable tool for you.
By activating it, you can seamlessly align with legal requirements and ensure that only eligible users gain access to your platform.
PAS 1296:2018 Compliance & Age Verification Check
We understand the criticality of meeting industry standards and regulations. That's why we are excited to inform you that PixLab Insight, the default Facial Recognition Engine for FACEIO, is ready to fulfill the PAS 1296:2018 code of practice for online age verification accredited by the UK's Age Check Certification Scheme (ACCS). Our technology guarantees robust age verification capabilities, bolstering your compliance efforts.
Experience the Future of Secure Facial Recognition ✨
At FACEIO, we are committed to providing you with state-of-the-art tools to safeguard your applications and users. The introduction of Minors Access Restriction adds an extra layer of security, giving you peace of mind and enabling you to cater to the right audience for your services.
To explore this exciting new feature and integrate it into your application, simply connect to the FACEIO Console, and activate this option from the Security Tab of your Application Manager. Our comprehensive documentation will guide you through the activation process and assist you in optimizing the functionality for your unique requirements.
24/7 Support & Integration Assistance
We would be thrilled to assist you in implementing the Minors Access Prevention Security Feature or answer any questions you may have. Reach out to our dedicated support team via the FACEIO Console or the Community Forum. Our experts are ready to provide you with top-notch assistance and help you unlock the full potential of FACEIO.
Embrace the power of age verification and elevate the security standards of your FACEIO application. Join us on this exciting journey as we revolutionize facial recognition technology together!
Stay secure, stay compliant, and stay ahead with FACEIO!
PixLab is delighted to announce the immediate availability of FACEIO, our web-based, facial authentication framework developed from scratch here at PixLab in the past few years.
The TLDR;
FACEIO is a cross-browser, facial authentication framework that can be implemented on any website via simple JavaScript snippet to easily authenticate users via Face Recognition instead of the traditional login/password pair or OTP code.
You can start implementing FACEIO on your website or web-based application immediately by following our getting started guide here.
The Developer Intro
FACEIO is a cross-browser, Cloud & On-Premise deployable, facial authentication framework, with a client-side JavaScript library (fio.js) that integrates seamlessly with any website or web application desiring to offer secure facial recognition experience to their users.
Put it simply, FACEIO is the easiest way to add passwordless authentication to web based applications. Simply implement fio.js on your website, and you will be able to instantly authenticate your existing users, and enroll new ones via Face Recognition using their computer Webcam or smartphone frontal camera on their favorite browser.
Once fio.js implemented on your website, you'll be able to instantly recognize your existing users, on-board new members securely with maximum convenience, and at real-time thanks to passwordless experience powered by face recognition.
FACEIO works with regular Webcams or smartphones frontal camera on all modern browsers, does not require biometric sensors to be available on the client side, and works seemingly with all websites and web-based applications regardless of the underlying front-end JavaScript framework or server-side language or technology.
Features
Authenticates and confirms identity of users instantly without FIDO keys, OTP codes, or security questions.
Full cross-browser compatibility (Chrome, Firefox, Safari, Edge & Chromium derivatives).
Zero external dependency. Only standard technology implemented in plain JavaScript & CSS.
Defense grade accuracy with less than 100 milliseconds recognition speed powered by state-of-the-art facial recognition engines.
Highest security standards. Privacy by design with maximum user convenience. No requirements for biometric sensor.
Adding FACEIO to your website
Implementing FACEIO on your website or webapp is straightforward. Before so, you need to create a new application first on the FACEIO Console, and link this resource to your website or web application. The checklist below highlights the steps to follow for a smooth integration of
fio.js on your site:
Create a new FACEIO application first: Follow the Application Wizard on the FACEIO Console to create your first application and link it to your website or web application.
The Application Wizard should automate the creation process for you. Usually, this involve inputting an application name, selecting a facial recognition engine, cloud storage region, reviewing security options, customizing the Widget layout, and so forth...
Once your first FACEIO application created, simply implementfio.js, our facial recognition JavaScript library on your website, and initialize the library with your application Public ID.
Congratulations 👏. You have FACEIO up & running! Now, it's time to enroll() and authenticate() your first user via face recognition. Refer to the HTML Integration Boilerplate on how to do so...
Some Links to Get Started
It’s super quick to implement FACEIO, and get it up & running on your website or web application. The following tutorials, and guides should help you get started with FACEIO:
Integration Guide: Learn how to implement fio.js, our facial recognition library on your website before rolling facial authentication to your audience...
Developer Center: Code samples, documentation, support channels, and all the resources you need to implement FACEIO on your website...
Our colleague Vincent just published an interesting blog post on dev.to on how to automatically filter images uploads (GIF included) according to their NSFW score via the PixLab NSFW API endpoint and apply a blur filter if adult, nudity or gory details is detected. Find out more information via the following links:
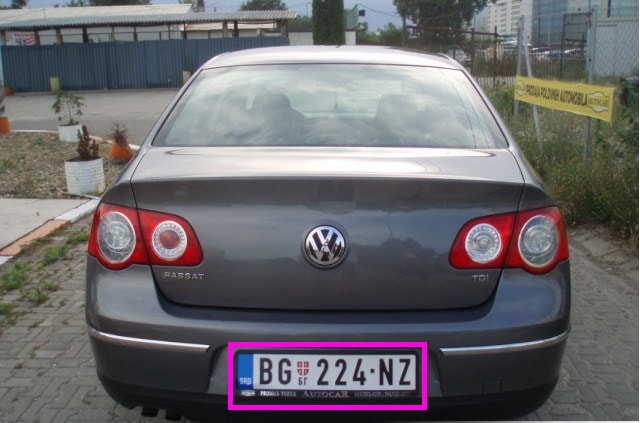
The SOD development team just published a new computer vision article on how to detect vehicles registration plates without heavy Machine Learning techniques, just standard image processing routines already implemented in the SOD library.
The article is available to consult here.
The /facemotion endpoint now besides outputting the rectangle coordinates for each detected human face, you'll be able to accurately extract their gender, age and emotion pattern via their facial shapes in just a matter of few milliseconds thanks to our newly deployed machine learning models hosted on OVH and AWS instances simultaneously for worldwide availability.
Below a Python sample to show you how easy is to predict the Age and Gender of any human face.
import requests
import json

# Detect all human faces present in a given image and try to guess their age, gender and emotion state via their facial shapes

# Target image: Feel free to change to whatever image holding as many human faces as you want
img = 'http://www.scienceforums.com/uploads/1282315190/gallery_1625_35_9165.jpg'

req = requests.get('http://api.pixlab.io/facemotion',params={
    'img': img,
    'key':'PixLab_API_Key',
})
reply = req.json()
if reply['status'] != 200:
    print (reply['error'])
    exit();

total = len(reply['faces']) # Total detected faces
print(str(total)+" faces were detected")
# Extract each face now
for face in reply['faces']:
    cord = face['rectangle']
    print ('Face coordinate: width: ' + str(cord['width']) + ' height: ' + str(cord['height']) + ' x: ' + str(cord['left']) +' y: ' + str(cord['top']))
    # Guess emotion
    for emotion in face['emotion']:
        if emotion['score'] > 0.5:
            print ("Emotion - "+emotion['state']+': '+str(emotion['score']))
    # Grab the age and gender
    print ("Age ~: " + str(face['age']))
    print ("Gender: " + str(face['gender']))
You can visit the PixLab Github repository for additional code samples in various programming languages including PHP and Java.
Symisc Systems is pleased to release the first major version of the SOD library! SOD is an embedded, modern cross-platform computer vision and machine learning software library that expose a set of APIs for deep-learning, advanced media analysis & processing including real-time, multi-class object detection and model training on embedded systems with limited computational resource and IoT devices.
SOD was built to provide a common infrastructure for computer vision applications and to accelerate the use of machine perception in open source as well commercial products.
Notable SOD features
Built for real world and real-time applications.
State-of-the-art, CPU optimized deep-neural networks including the brand new, exclusive RealNets architecture.
The documentation works both as an API reference and a programming tutorial. It describes the internal structure of the library and guides one in creating applications with a few lines of code. Note that SOD is straightforward to learn, even for new programmer.
Since you probably own a smartphone these days, you may have noticed someone from your entourage popping up on the social networks with a flower crown or some dog stuff on his head. This effect is produced by the Snapchat app, is named filters and every competitor of the app is copying that nowadays.
Why? Personally, I don't know and honestly found those filters ridiculous but quite interesting if regarded as a computer vision & programming challenge. In this blog post, we'll try to desiccate and answer some questions about them: How they are actually made? what software libraries are needed to mimic their behavior? and finally, we'll implement some famous filters using Python or whatever language that support HTTP requests with the help of the PixLab API (More on this later).
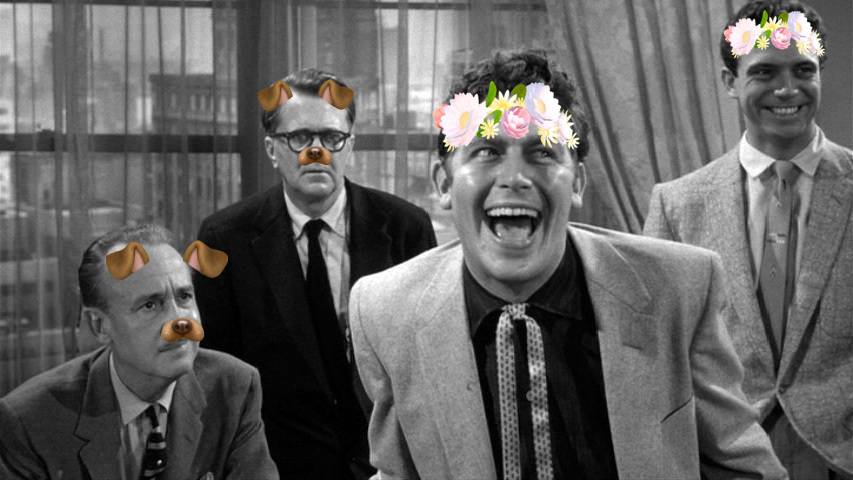
With no further ado, let's dig a little bit onto this Snapchat output (In fact, it is made by our program that we'll implement below):
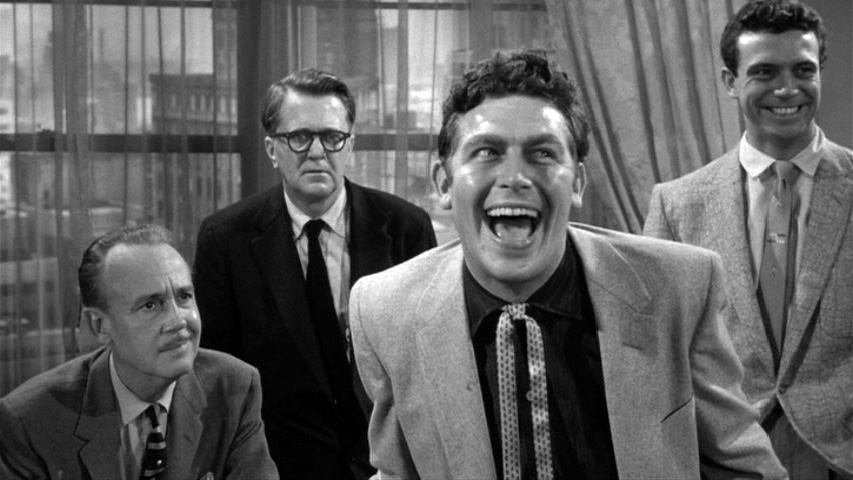
1957 Elia Kazan film “A Face in the Crowd.” Photo courtesy of Warner Bros.
To produce such effect, two phases are actually needed: Analysis & Processing.
Computer Vision to the rescue
The analysis phase is always the first pass and is the most complicated. It require some computer vision algorithms running under the hood and performing the following tasks:
Face detection
Given an input image or video frame, find out all present human faces and output their bounding box (i.e. The rectangle coordinates in the form: X, Y, Width & Height).
Face detection has been a solved problem since the early 2000s but faces some challenges including detecting tiny, partial & non-frontal faces. The most widely used technique is a combination of Histogram of Oriented Gradients (HOG for short) and Support Vector Machine (SVM) that achieve mediocre to relatively good detection ratios given a good quality image but this method is not capable of real-time detection at least on the CPU.
Here is how the HOG/SVM detector works:
Given an input image, compute the pyramidal representation of that image which is a pyramid of multi scaled (maybe Gaussian) downed version of the original image. For each entry on the pyramid, a sliding window approach is used. The sliding window concept is quite simple. By looping over an image with a constant step size, small image patches typically of size 64 x 128 pixels are extracted at different scales. For each patch, the algorithm makes a decision if it contains a face or not. The HOG is computed for the current window and passed to the SVM classifier (Linear or not) for the decision to take place (i.e. Face or not). When done with the pyramid, a non-maxima suppression (NMS for short) operation usually take place in order to discard stacked rectangles. You can read more about the HOG/SVM combination here.
At Symisc we'll be soon launching a general purpose embedded object detection framework (including face detection) that achieve real-time performance on the CPU using a combination of random-forest and neural networks: https://github.com/symisc.
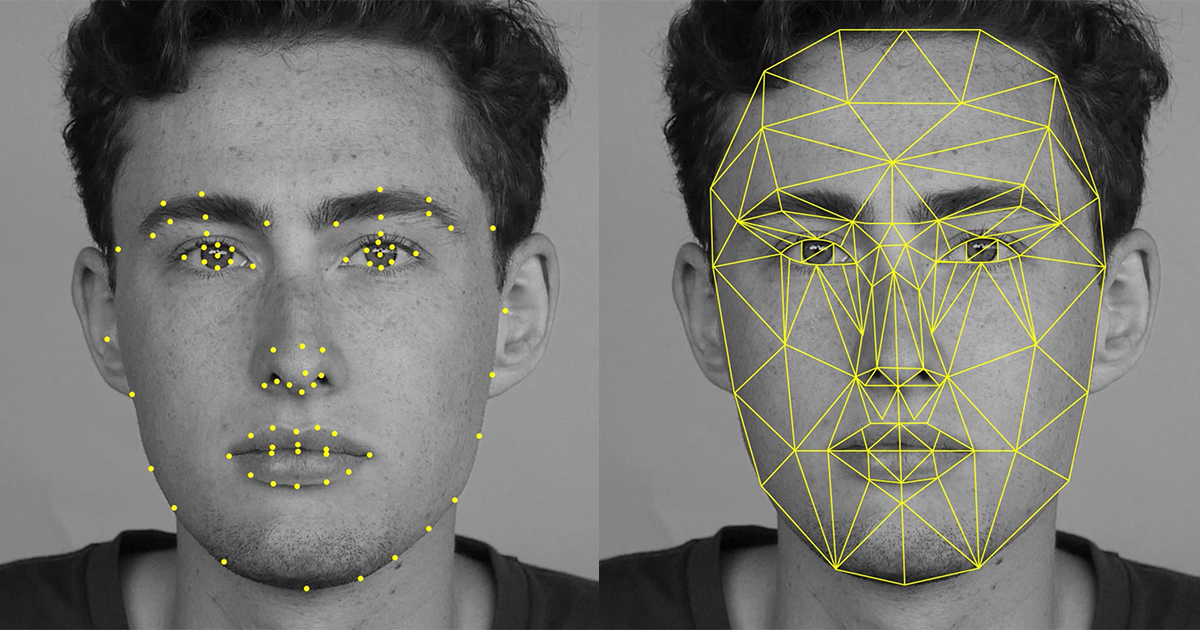
Facial Landmarks
This is the next step in our analysis phase and works as follows:
For each detected face, output the local region coordinates for each member or facial feature of that face. This includes the eyes, bone, lips, nose, mouth,... coordinates usually in the form of points (X,Y).
Extracting facial landmarks is a relatively cheap operation for the CPU given a bounding box (i.e. Cropped image with the target face), but quite difficult to implement for the programmer unless some not-so-fast machine learning techniques such as training & running a classifier is used.
In some and obviously useful cases, face detection and landmarks extraction are combined into a single operation.
Dlib achieve that (Nope, in fact Dlib require face detection to take place at first and shape extraction next so it's a two step operation).
PixLab achieve that in a single call via the facelandmarks API endpoint that we will be using later.
We move now to the next part of our quest for the best snap: The processing phase.
Image & Video Processing
Once we have the facial landmarks, 70% of the work is done, all we have to do right now is to superpose the target filter such as the flower crown, dog nose, etc. on top of the desired region of the face like the bone for the flower crown case. This operation is named compositing. That is, combine multiple visual elements from separate sources into a single image.
For the sake of simplicity, we'll stick with image processing only. Video processing is similar in concept but require some additional steps such as extracting each frame using a decoder (i.e. FFmpeg or CvCapture from OpenCV) and treating that frame exactly like you would do with an image.
Now that we understand how those filters are created, it's time to start producing a few ones using some code in the next section!
Finding the Best Software Library
Since there is a huge gap between theory and practice, finding a software library whether open source or not that is capable of detecting faces, extracting their landmarks with video and image processing capability and above all embeddable in your app is not an easy task.
In fact, no software library is capable of doing that not even the popular OpenCV library that you may think of at first. OpenCV have no landmarks extraction capability, a mediocre face detector and weighs a ton but built with very good video & image processing capability I must say.
Your best bet if you are looking for an embedded solution is mixing Dlib with the MagickWand C library from the ImageMagick project, but compiling and setting up these two in your app require another blog post book (One is written in C++11, the other plain C, so...). Stasm is relatively good at facial features extraction but require a third-party library for face detection. CLM-framework is also capable of facial landmarks extraction but again no face detector built-in. GPUImage is a library of choice for simple image & video processing but appears to be iOS exclusive. libccv seems also a potential candidate. It is shipped with a face detector without landmarks extractor though, few image manipulation routines (didn't find the composite routine) but it has not been updated since at least two years.
Note that we are talking about an embedded solution here and so we have explicitly omitted the nice Python libraries of NumPY or SciKit unless your are embedding the python interpreter in your own app!?
Restful APIs come to the rescue
Fortunately for the app builder, producing those filters is quite easy if some cloud vision service is used instead of building & compiling your own. All you need to do is to make a simple HTTP request to the target service for the analysis phase to take place on behalf of you. The notable cloud providers are:
The former two (Microsoft & Google) offers machine vision only. In others words, you'll be able to detect faces, extract their shapes using state-of-the-art machine learning algorithms but, it is up to you to perform the processing phase. That is, composite the flower crown or whatever filter using your own image processing library.
PixLab on the other side offer both computer vision & media processing as a single set of unified Restful APIs.
What is PixLab?
As said, PixLab is a machine learning SaaS platform with a set of unified Restful APIs for all your media analysis & processing tasks. It is shipped with over 130 commands (API endpoints) including:
PixLab is being developed by a small team of engineers and data scientist distributed around the globe under the leadership of Symisc Systems. The service was launched earlier on June 2017. It took us 10 months of tedious work to ship the first stable version of the product and we really hope that you find it useful.
import requests
import json

# Detect all human faces & extract their facial landmarks via `facelandmarks`.
# Once done, mimic the famous Snapchat flower crown filter.
# Only three commands are actually needed in order to mimic the Snapchat filters:
# face landmarks:         https://pixlab.io/cmd?id=facelandmarks
# smart resize:           https://pixlab.io/cmd?id=smartresize
# merge:                  https://pixlab.io/cmd?id=merge
# Optionally: blur, grayscale, drawtext, oilpaint, etc. for cool background effects.

# The following is target image that we'll superpose our filter on top of it.
# This image must contain at least one face. free free to change the link to whatever your want.
# Note that you can upload your own images from your app very easily. Refer to the docs for additional info.
img = 'https://ak6.picdn.net/shutterstock/videos/10819841/thumb/8.jpg'

# The flower crown to be composited on top of the target face
flower_crown = 'http://pixlab.xyz/images/flower_crown.png'

# Your PixLab API key
key = 'Your_PixLab_Key'

# This list contain all the coordinates of the regions where the flower crown should be
# Composited on top of the target face later using the `merge` command.
coordinates = []

# First off, call `facelandmarks` and extract all present faces plus their landmarks.
print ("Detecting and extracting facial landmarks..")
req = requests.get('https://api.pixlab.io/facelandmarks',params={
    'img': img,
    'key': key,
})
reply = req.json()
if reply['status'] != 200:
    print (reply['error'])
    exit();

total = len(reply['faces']) # Total detected faces
if total < 1:
    # No faces were detected
    print ("No faces were detected..exiting")
    exit()

print(str(total)+" faces were detected")

# Iterate all over the detected faces and make our flower crown filter..
for face in reply['faces']:
    cord = face['rectangle']

    # Show the face coordinates
    print ("Coordinates...")
    print ('twidth: ' + str(cord['width']) + ' height: ' + str(cord['height']) + ' x: ' + str(cord['left']) +' y: ' + str(cord['top']))

    # Show landmarks:
    print ("Landmarks...")

    landmarks = face['landmarks']

    print ("tBone Center: X: "     + str(landmarks['bone']['center']['x'])     + ", Y: "+str(landmarks['bone']['center']['y']))
    print ("tBone Outer Left: X: " + str(landmarks['bone']['outer_left']['x']) + ", Y: "+str(landmarks['bone']['outer_left']['y']))
    print ("tBone Outer Right: X: "+ str(landmarks['bone']['outer_right']['x'])+ ", Y: "+str(landmarks['bone']['outer_right']['y']))


    # More landmarks on the docs..Let's make our flower crown filter now


    # Resize the flower crown which is quite big right now to exactly the face width using smart resize.
    print ("Resizing the snap flower crown...")
    req = requests.get('https://api.pixlab.io/smartresize',params={
        'img':flower_crown,
        'key':key,
        'width': 20 + cord['width'], # Face width
        'height':0 # Let Pixlab decide the best height for this picture
        })
    reply = req.json()
    if reply['status'] != 200:
        print (reply['error'])
        exit()
    else:
        fit_crown = reply['link']
               # Composite the flower crown at the bone center region
                coordinates.append({
           'img': fit_crown, # The resized crown flower
           'x': landmarks['bone']['center']['x'],
           'y': landmarks['bone']['center']['y'] - 10,
           'center':   True,
           'center_y': True
               })


# Finally, Perform the composite operation
print ("Composite operation...")
req = requests.post('https://api.pixlab.io/merge',
    headers={'Content-Type':'application/json'},
    data=json.dumps({
        'src':img, # The target image.
        'key':key,
        'cord': coordinates # The coordinates list filled earlier with the resized images (i.e. The flower crown & the dog parts) and regions of interest
    })
)
reply = req.json()
if reply['status'] != 200:
    print (reply['error'])
else:
    # Optionally call blur, oilpaint, grayscale, meme for cool background effects..
    print ("Snap Filter Effect: "+ reply['link'])
Detecting and extracting facial landmarks..
4 faces were detected
Coordinates...
        width: 223 height: 223 x: 376 y: 112
Landmarks...
        Nose: X: 479.3, Y: 244.2
        Bottom Lip: X: 481.7, Y: 275.3
        Top Lip: X: 481.6, Y: 267.1
        Chin: X: 486.7, Y: 327.3
        Bone Center: X: 490, Y: 125
        Bone Outer Left: X: 356, Y: 72
        Bone Outer Right: X: 564, Y: 72
        Bone Center: X: 490, Y: 125
        Eye Pupil Left: X: 437.1, Y: 177.3
        Eye Pupil Right: X: 543.7, Y: 173.3
        Eye Left Brown Inner: X: 458.2, Y: 161.1
        Eye Right Brown Inner: X: 504.9, Y: 156.1
        Eye Left Outer: X: 417.5, Y: 180.9
        Eye Right Outer: X: 559.4, Y: 175.6
Resizing the snap flower crown...
Composite operation...

                           ...

Snap Filter Effect: https://pixlab.xyz/24p596187b0b1b68.jpg
If this is the first time you see the PixLab API in action, your are invited to read the excellent introduction to the API in 5 minutes or less.
To mimic such behavior, only three commands (API endpoints) were actually needed to produce such a filter:
facelandmarks is the analysis command we called first on line 29 of the python gist. As said earlier, it is an all in one operation. It tries to detect all present human faces, extract their rectangle coordinates and more importantly, it outputs the landmarks for each facial feature such as the eyes, bone, nose, mouth, chin, lips, etc. of the target face. We'll use these coordinates later to composite stuff on top of the desired face region. In our case, only the bone region coordinates were actually needed to composite the flower crown. Refer to the PixLab documentation for additional information on the facelandmarks command.
Now for each detected face, perform the following processing operations (We have done with the analysis phase at this stage):
smartresize is called next on line 84 in order to fit the image to be composited (i.e. The flower crown) to the desired dimension such as the bone width of the target face. This is an essential step since the flower crown is quite big at this stage compared to the bone width. The bone width is assumed to be the same as the face width so we use that value. The engine is smart enough to calculate the height for us so we leave the height field untouched.
merge aka composite is the main processing command we calls next. It expects a list of coordinates (X, Y) and a list of images to be composited (i.e. The flower crown) on top of the target region (The bone center in our case). The coordinates were collected on line 97 and passed verbatim to the merge command on line 108. Refer to the PixLab documentation for additional information on the merge command.
Optionally, you may be tempted to use some photo filter commands such as: grayscale, blur, oilpaint, etc. for some cool background effects if desired.
We move now to a more complete example with the famous dog filter.
import requests
import json
# Mimic the two famous Snapchat filters: The flower crown & the dog facial parts filter.
# The target image must contain at least one human face. The more faces you got, the more funny it should be!
#
# Only three commands are actually needed in order to mimic the Snapchat filters:
# face landmarks: https://pixlab.io/cmd?id=facelandmarks
# smart resize: https://pixlab.io/cmd?id=smartresize
# merge: https://pixlab.io/cmd?id=merge
# rotate (Optionally): https://pixlab.io/cmd?id=rotate
# meme (Optionally): https://pixlab.io/cmd?id=meme for Drawing some funny text
# Optionally: blur, grayscale, oilpaint, etc. for cool background effects.
# Target image to composite stuff on. Must contain at least one face.
img = 'https://trekkerscrapbook.files.wordpress.com/2013/09/face-08.jpg'
# The flower crown.
flower = 'http://pixlab.xyz/images/flower_crown.png'
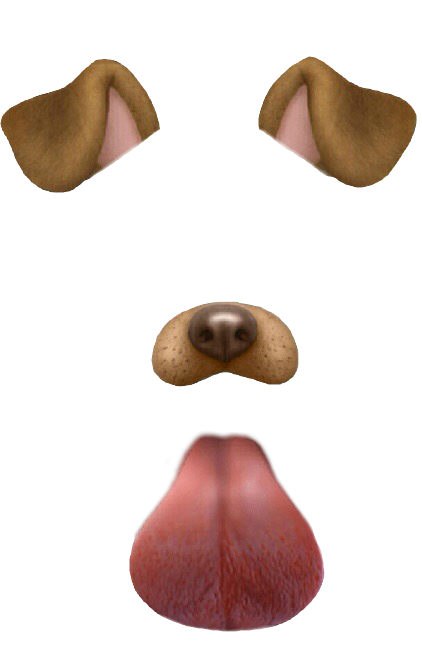
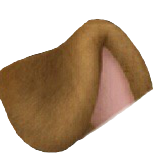
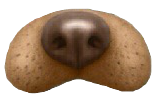
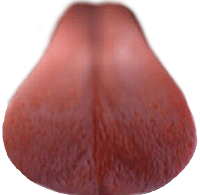
# The dog facial parts: Left & right ears, nose & optionally the tongue
dog_left_ear = 'http://pixlab.xyz/images/dog_left_ear.png'
dog_right_ear = 'http://pixlab.xyz/images/dog_right_ear.png'
dog_nose = 'http://pixlab.xyz/images/dog_nose.png'
dog_tongue = 'http://pixlab.xyz/images/dog_tongue.png'
# Your PixLab API key
key = 'Your_Pixlab_Key'
# If set to True then composite the flower crown. Otherwise, composite the dog stuff.
draw_crown = False
# Resize an image (Dog parts or the flower crown) to fit the face dimension using smartresize.
def smart_resize(img,width,height):
print ("Resizing filter image...")
req = requests.get('https://api.pixlab.io/smartresize',params={
'img':img,
'key':key,
'width': width,
'height': height
})
reply = req.json()
if reply['status'] != 200:
print (reply['error'])
exit()
else:
return reply['link'] # Resized image
# First step, Detect & extract the landmarks for each human face present in the image.
req = requests.get('https://api.pixlab.io/facelandmarks',params={
'img': img,
'key': key,
})
reply = req.json()
if reply['status'] != 200:
print (reply['error'])
exit();
total = len(reply['faces']) # Total detected faces
if total < 1:
print ("No faces were detected..exiting")
exit()
print(str(total)+" faces were detected")
# This list contain all the coordinates of the regions where the flower crown or the dog facial parts should be
# Composited on top of the target face later using the `merge` command.
coordinates = []
# Iterate all over the detected faces and make our stuff
for face in reply['faces']:
# Show the face coordinates
print ("Coordinates...")
cord = face['rectangle']
print ('twidth: ' + str(cord['width']) + ' height: ' + str(cord['height']) + ' x: ' + str(cord['left']) +' y: ' + str(cord['top']))
# Show landmarks of interest:
print ("Landmarks...")
landmarks = face['landmarks']
print ("tNose: X: " + str(landmarks['nose']['x'] ) + ", Y: "+str(landmarks['nose']['y']))
print ("tBone Center: X: " + str(landmarks['bone']['center']['x']) + ", Y: "+str(landmarks['bone']['center']['y']))
print ("tBone Outer Left: X: " + str(landmarks['bone']['outer_left']['x']) + ", Y: "+str(landmarks['bone']['outer_left']['y']))
print ("tBone Outer Right: X: "+ str(landmarks['bone']['outer_right']['x'])+ ", Y: "+str(landmarks['bone']['outer_right']['y']))
#More landmarks on the docs...
draw_crown = not draw_crown
if draw_crown:
# Resize the flower crown to fit the face width
fit_crown = smart_resize(
flower,
cord['width'] + 20, # Face width
0 # Let Pixlab decide the best height for this picture
)
# Composite the flower crown at the bone center region.
print ("tCrown flower at: X: " + str(landmarks['bone']['center']['x']) + ", Y: "+str(landmarks['bone']['center']['y']))
coordinates.append({
'img': fit_crown, # The resized crown flower
'x': landmarks['bone']['center']['x'],
'y': landmarks['bone']['center']['y'] + 5,
'center': True,
'center_y': True
})
else:
# Do the dog facial parts using the bone left & right regions and the nose coordinates.
print ("tDog Facial Parts...")
coordinates.append({
'img': smart_resize(dog_left_ear, cord['width']/2,cord['height']/2),
'x': landmarks['bone']['outer_left']['x'], # Adjust to get optimal effect
'y': landmarks['bone']['outer_left']['y'] # Adjust to get optimal effect
})
coordinates.append({
'img': smart_resize(dog_right_ear, cord['width']/2,cord['height']/2),
'x': landmarks['bone']['outer_right']['x'], # Adjust to get optimal effect
'y': landmarks['bone']['outer_right']['y'] # Adjust to get optimal effect
})
coordinates.append({
'img': smart_resize(dog_nose, cord['width']/2,cord['height']/2),
'x': landmarks['nose']['x'], # Adjust to get optimal effect
'y': landmarks['nose']['y'] + 2, # Adjust to get optimal effect
'center': True,
'center_y': True
})
# Finally, Perform the composite operation
print ("Composite operation...")
req = requests.post('https://api.pixlab.io/merge',
headers={'Content-Type':'application/json'},
data=json.dumps({
'src':img, # The target image.
'key':key,
'cord': coordinates # The coordinates list filled earlier with the resized images (i.e. The flower crown & the dog parts) and regions of interest
})
)
reply = req.json()
if reply['status'] != 200:
print (reply['error'])
else:
# Optionally call blur, oilpaint, grayscale,meme for cool background effects..
print ("Snap Filter Effect: "+ reply['link'])
As you may notice, no matter how complex your filter, the logic is always the same: facelandmarks first, smartresize next and finally merge to generate the filter.
Tip: If you want to download the image output immediately without remote storage, set the Blob parameter to true in your final HTTP request (line 148).
Compositing the flower crown is quite easy to implement. All we have to do is to locate the bone center region of the target face and invoke merge with the X & Y coordinates of that region. Don't forget to set the center & center_y parameters for each entry the merge command takes to True. This will calculate the best position for the filter. The same rule apply to the dog nose except we used the face nose coordinates.
The difficulty here is to find the best location for the left & right ear. The bone left most region is selected for the left ear and we adjusted the Y position for optimal effect. The same rule apply for the right ear. The rotate command can be of particular help here if the target face is inclined to some degree.
Output something like this with some text (i.e. MEME) on the bottom of the image:
Using this code:
import requests
import json
# Make an eye mask plus a mustache filter and finally draw some text on the bottom of the image.
#
# Only three commands are actually needed in order to mimic the Snapchat filters:
# face landmarks: https://pixlab.io/cmd?id=facelandmarks
# smart resize: https://pixlab.io/cmd?id=smartresize
# merge: https://pixlab.io/cmd?id=merge
# rotate (Optionally): https://pixlab.io/cmd?id=rotate
# meme (Optionally): https://pixlab.io/cmd?id=meme Draw some funny text
# Optionally: blur, grayscale, oilpaint, etc. for cool background effects.
# Target image to composite stuff on. Must contain at least one face.
img = 'http://pixlab.xyz/images/wm.jpg'
# The eye mask.
eye_mask = 'http://pixlab.xyz/images/eye_mask.png'
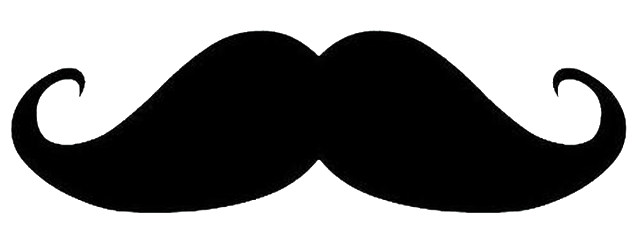
# The mustache!
mustache = 'http://pixlab.xyz/images/mustache.png'
# Your PixLab API key
key = 'My_Pix_Key'
# Resize and image (Eye mask, mustache, etc.) to fit the face dimension using smart resize.
def smart_resize(img,width,height):
print ("Resizing image...")
req = requests.get('https://api.pixlab.io/smartresize',params={
'img':img,
'key':key,
'width': width,
'height': height
})
reply = req.json()
if reply['status'] != 200:
print (reply['error'])
exit()
else:
return reply['link'] # Resized image
# First step, Detect & extract the landmarks for each human face present in the image.
req = requests.get('https://api.pixlab.io/facelandmarks',params={
'img': img,
'key': key,
})
reply = req.json()
if reply['status'] != 200:
print (reply['error'])
exit();
total = len(reply['faces']) # Total detected faces
if total < 1:
print ("No faces were detected..exiting")
exit()
print(str(total)+" faces were detected")
# This list contain all the coordinates of the regions where the flower crown or the dog part should be
# Composited on the target image later using the `merge` command.
coordinates = []
# Iterate all over the detected faces and make our stuff
for face in reply['faces']:
# Show the face coordinates
print ("Coordinates...")
cord = face['rectangle']
print ('twidth: ' + str(cord['width']) + ' height: ' + str(cord['height']) + ' x: ' + str(cord['left']) +' y: ' + str(cord['top']))
# Show landmarks of interest:
print ("Landmarks...")
landmarks = face['landmarks']
print ("tNose: X: " + str(landmarks['nose']['x'] ) + ", Y: "+str(landmarks['nose']['y']))
print ("tTop Lip: X: " + str(landmarks['top_lip']['x']) + ", Y: "+str(landmarks['top_lip']['y']))
print ("tChin: X: " + str(landmarks['chin']['x']) + ", Y: "+str(landmarks['chin']['y']))
print ("tEye Pupil Left: X: " + str(landmarks['eye']['pupil_left']['x']) + ", Y: "+str(landmarks['eye']['pupil_left']['y']))
print ("tEye Pupil Right: X: " + str(landmarks['eye']['pupil_right']['x']) + ", Y: "+str(landmarks['eye']['pupil_right']['y']))
print ("tEye Left Outer: X: " + str(landmarks['eye']['left_outer']['x']) + ", Y: "+str(landmarks['eye']['left_outer']['y']))
print ("tEye Right Outer: X: " + str(landmarks['eye']['right_outer']['x']) + ", Y: "+str(landmarks['eye']['right_outer']['y']))
# More landmarks on the docs...
# Do the mustache using the top lip coordinates.
print ("tMustache...")
coordinates.append({
'img': smart_resize(mustache, cord['width']/2,0),
'x': landmarks['top_lip']['x'], # Adjust to get optimal effect
'y': landmarks['top_lip']['y'] - 50, # Adjust to get optimal effect
'center': True # Composite at the center of the X point.
})
# Do the eye mask using the top lip coordinates.
print ("tEye Mask...")
coordinates.append({
'img': smart_resize(eye_mask, cord['width'],0),
'x': landmarks['bone']['center']['x'], # Adjust to get optimal effect
'y': landmarks['eye']['left_brow_inner']['y'], # Adjust to get optimal effect
'center': True, # Composite at the center of the X point.
'center_y': True # Composite at the center of the Y point.
})
# Finally, Perform the composite operation when we exit the loop
print ("Composite operation...")
req = requests.post('https://api.pixlab.io/merge',
headers={'Content-Type':'application/json'},
data=json.dumps({
'src':img, # The target image.
'key':key,
'cord': coordinates # The coordinates list filled earlier with the composited images & regions of interest
})
)
reply = req.json()
if reply['status'] != 200:
print (reply['error'])
else:
snap = reply['link'];
# Snap created, let's draw some MEME at the bottom of the pic.
req = requests.get('http://api.pixlab.io/meme',params={
'img': snap,
'bottom': 'sounds good?',
'cap':True, # Capitalize text,
'strokecolor': 'black',
'key':key
})
reply = req.json()
if reply['status'] != 200:
print (reply['error'])
else:
print ("Snap Filter + Meme: "+ reply['link'])
Note how smartresize is of particular help here. If we did not rely on it, the mustache and the eye mask would occupy the entire face instead of a small region. When called, the PixLab engine should calculate the best output dimension for us, all we have to do is to pass the desired width and the height will be automatically adjusted for us (or vise versa).
We also called the meme command for the first time to draw some text on the bottom of the image. This command is so flexible that you can supply font name, size & colors, stroke width & height, etc. Take a look at the meme documentation for additional information.
Making Your Own Stuff
You may be tempted to execute the code listed above and see it in action. All you have to do is put your own API key instead of the dummy one. If you don't have a key, you may generate one from your PixLab dashboard (We do offers free trials right now so you don't have to pay anything). If you don't have a PixLab account, sign up here.
If you want to test immediately, you are invited to use my own key. It is an enterprise class one, you can use it for other purposes such ocr, image tagging, screen capture, nsfw detection and so forth and it will expire in a week or so:
My API Key:33fea245683ae1b56e0e47403d466.
Sorry, you come too late, that key is already expired now but why not generate your own API Key from the PixLab dashboard.
As we saw, making Snpachat filters is a two step operation. The analysis phase is always the first pass but also the most complicated. For each detected face in the image or video frame, extract and record the facial landmarks for that face. Most filters require a tiny set of landmarks if not one like the bone region for the flower crown filter. We saw that few open source software libraries are capable of doing face detection and landmarks extraction at the same time except Dlib and the future Symisc SoD but alternatives are always possible.
Once you have the facial landmarks, most of the complicated work is done. We can start the processing phase which is a relatively cheap composite operation. All we have to do is to superpose the target filter on top of the desired region of the face. We saw that GPUImage and MagickWand are potential candidate for our image processing tasks.
Our proposed solution is to rely on the PixLab Restful APIs for this kind of task since it is capable of media analysis & processing at the same time and it avoid us all the hassle of integrating the necessary libraries needed to perform such a work. A simple HTTP request from any programming language to the target commands:
Since we work at Symisc Systems, the company sponsoring the development of PixLab, we really believe that PixLab is a superior & elegant alternative to your media analysis & processing tasks and you are invited to take a look at the introduction course to see it in action.
Finally, if you have any suggestions or critics, your can email the authors directly or leave a comment below.


